
Courtesy of one of my wife's clients, we had a spectacular view of the falls from our room at the Niagara Falls Marriott Fallsview Hotel and Spa.
In this post I've selected three more photos to illustrate several tools included with the Develop module of Adobe Photoshop Lightroom® 5.4.
To take full advantage of Lightroom's editing capabilities, I always save files in the NEF (Nikon Electronic Format) RAW file format. (For a discussion of the benefits of shooting RAW, see my Top Five Reasons People Don't Shoot RAW.)
NOTE: To view a larger version, click the image once or twice. To return to the post, use your browser's back button.
Here's the first original that was taken from our room:
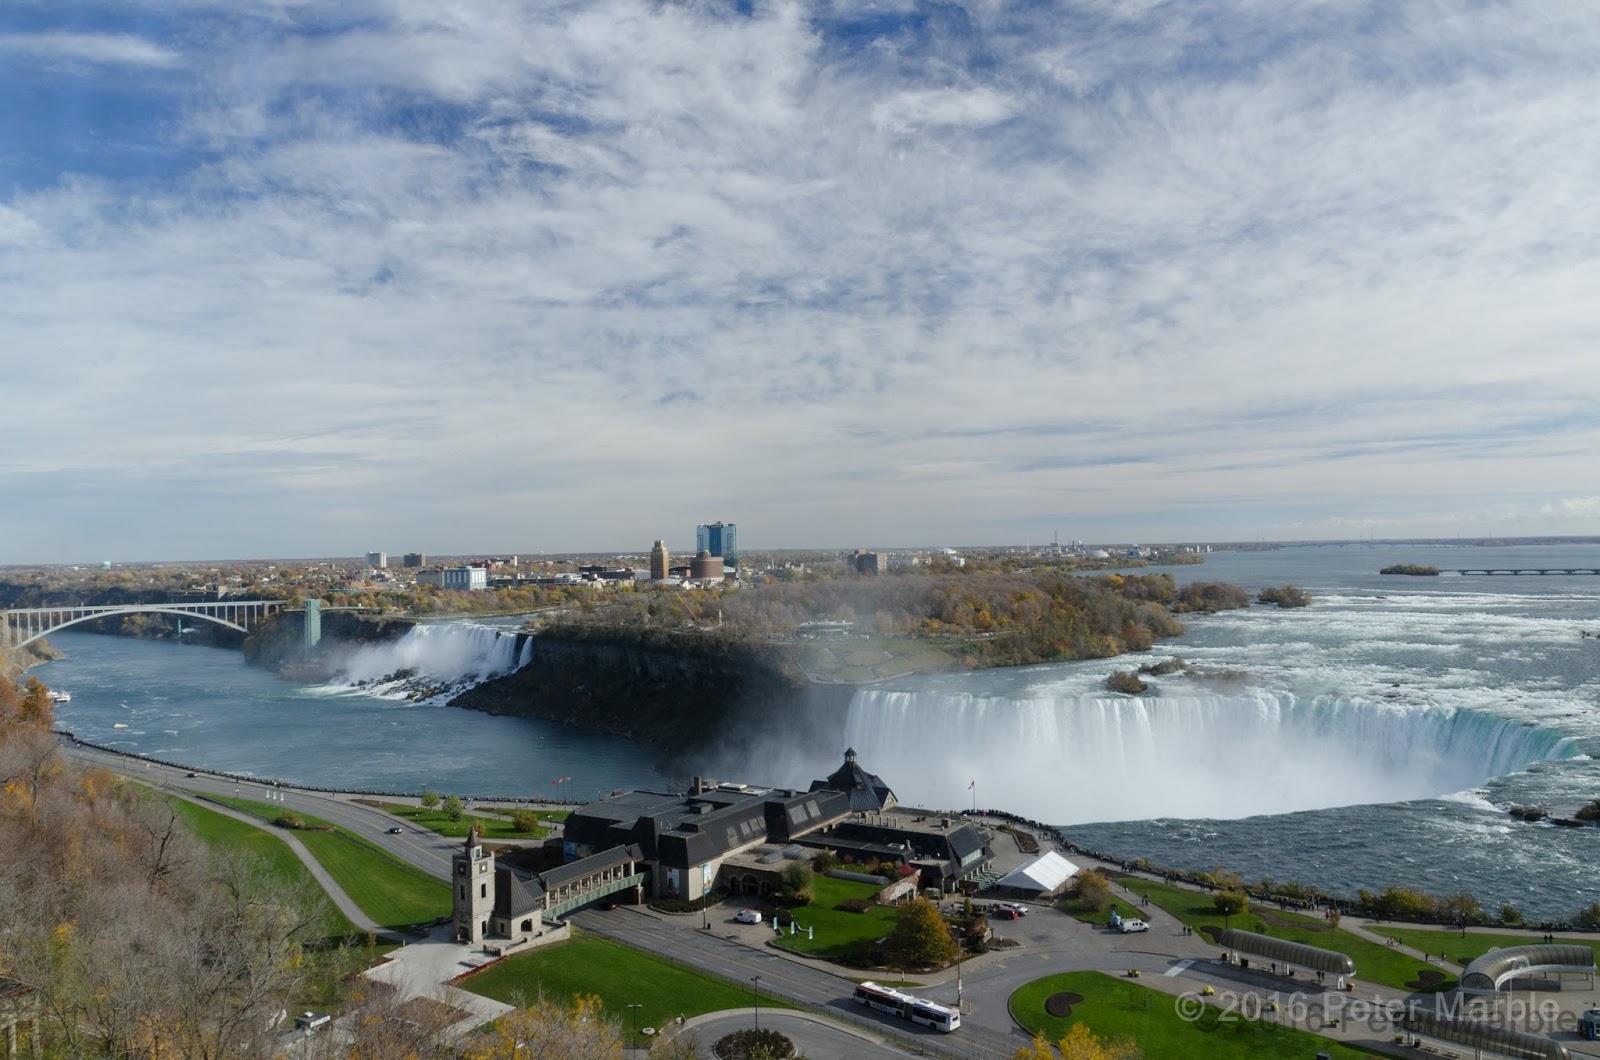
and here's the edit:

- To straighten the image, I used Perspective Rotate (+0.9) and then the Crop Overlay to crop it for more of a panoramic feel.
- Then to darken the sky, I applied a Graduated Filter to reduce the exposure and highlights in the top half of the image, followed by a bit of Sharpening and Noise Reduction.
- The water and mist of the Horseshoe Falls were already a bit blown out, but I wanted to boost the highlights elsewhere in the image. The Radial Filter is designed for just this type of situation. You select a round/oval area of the desired size and location, in this case the Horseshoe Falls. Next you make your adjustments that are applied everywhere except the filtered area. In this case I intentionally increased highlights more than I ultimately wanted, and then after closing the filter, reduced the highlights everywhere, including the Horseshoe Falls.
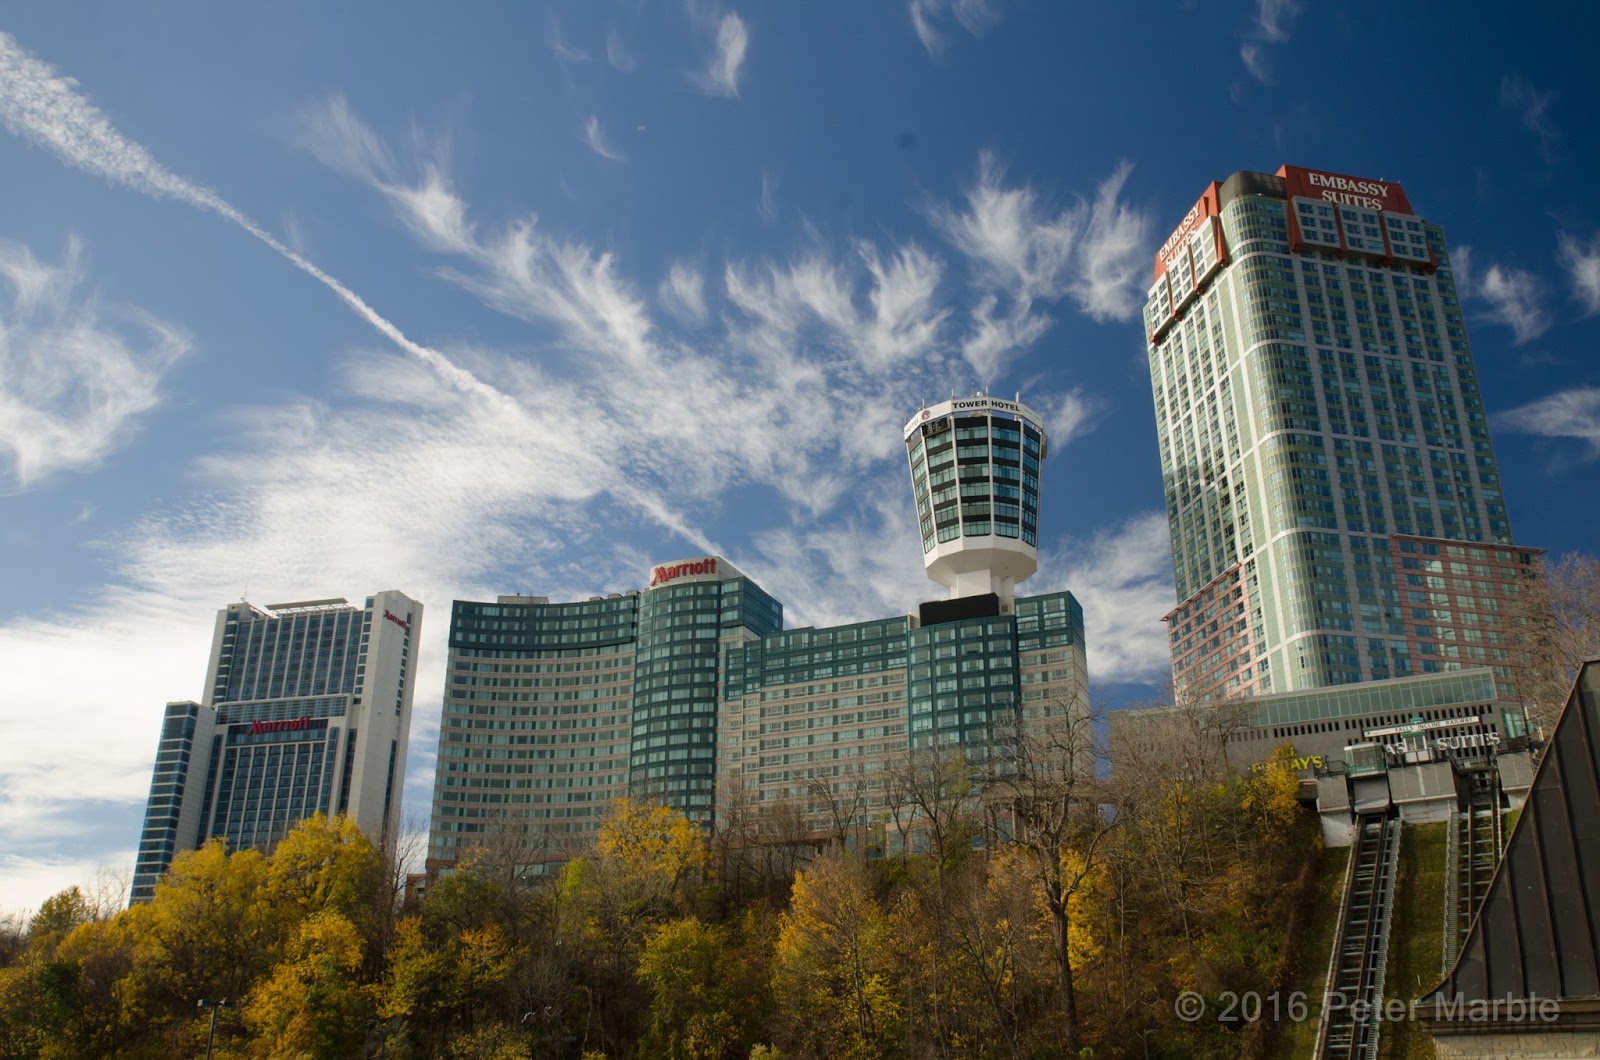
and here's the edit:

- I started with the Spot Removal tool to get rid of some dust bunnies that had glommed onto my sensor in the course of changing lenses - the worst one was above the tower third from the left. It's a great work around for actually cleaning the sensor which I finally did a few days ago. For a good article of how to do this, read Cleaning your Sensor by Thom Hogan.
- Next I made some minor adjustments to the highlights and dark tones, and to add a bit more colour, increased the yellow saturation and luminance.
- Finally, having already applied the profile adjustment for the my lens (Tamron SP AF 17-50mm F/2.8 XR Di II VC LD Aspherical [IF]) when I imported the photos into Ligthroom, for the most important adjustment, in the Lens Corrections panel I selected Upright, Auto which magically straightened the buildings!

and here's the edit:

- To add some colour to the sky, I again used a Graduated Filter.
- To remove some of the blowing leaves and dust bunnies, the Spot Removal tool provided an easy fix.
- Once again, to stretch the image, I used the Crop Overlay tool.
- And finally, to give the image a bit more punch, I added a bit of saturation and vibrance.


